Reloading Your Own Ammunition
You don’t have to handload your own ammunition to be a deadly shot and excellent hunter, but it helps. Factory rifle ammo is powerful, dependable, accurate and made in enough varieties to handle any hunting requirement. So why does anyone reload? Let’s count the ways ...
SAVE MONEY
Folks who shoot a lot can justify the costs of reloading tools amortized over a decade or more. Depending on the quality of materials used, reloads can run one-third to one-half the cost of new factory ammo. Of course, that doesn’t count your time. Depending on the type of reloading machines you employ, you might crank out one to five boxes per hour. Most people don’t count this because loading for them is a fascinating, satisfying hobby. Shooting a deer with a factory cartridge: $3.00. Shooting a deer with a homemade cartridge: Priceless.
IMPROVED PERFORMANCE
This is a big reason for reloading. Factory ammo must be “one size fits all.” This means it must bow to the lowest common denominator, i.e. old rifles incapable of handling the kinds of pressures, thus velocities and performance, of fully modern guns. A classic example is the 7x57mm Mauser, a splendid deer round that factories load to 46,000 cup (copper units of pressure) in case they are fired in old rifles. Modern rifles can easily handle pressures to 50,000 cup, the equivalent of 100 to 150 fps more velocity. Handloaders also improve performance by sizing cases to precisely fit their particular rifle’s chambers and by custom seating bullets for the ideal match to the rifle’s throat. Such custom fittings improve accuracy significantly, sometimes doubling it. Reducing a load’s power is another handloader’s trick. Stuff a 30-06 case with a small dose of the right powder and you can make it recoil like a .243 Win. and match the trajectory and energy of a .30-30. Great for teaching and practice. Reduced loads can make a 30-378 Weatherby shoot like a 308 Winchester when you don’t need hyper velocity.
OBSOLETE AND RARE CARTRIDGES OR GUNS
Some cartridges are sold in limited configurations or no longer available at all. Check out the selection of .222 Remington Magnum, .264 Win. Mag., .307 Win., etc. at your local sporting goods store. If you have a rifle chambered for an unpopular cartridge, reloading can breathe new life into it.
WILDCAT CARTRIDGES
Serious gun nuts often chamber their rifles for odd cartridge shapes never sold commercially, such as the 30-06 necked down to 6.5mm or .243 or the .221 Remington Fireball shortened and necked to .17. These must be custom formed and loaded.
Inexpensive Plinking Rounds
By using extra light, inexpensive bullets, even home-cast lead ones, handloaders can build reduced power loads that burn light charges of powder. Velocities can be half that of full-house loads. These are ideal for training, practice, and small game hunting. And such low pressure loads don’t wear out brass cases. Those can be loaded as many as a dozen times this way.
HOBBY
Some people just like creating things, working with their hands, taking as much control of their lives as they can. If you enjoy growing your vegetables, tuning your car, building your own deck, etc., you’ll probably love handloading.
EDUCATION
Learning to reload inspires you to learn more about ballistics and ammunition/gun performance. The result is you often become a better shot.
YOU SHOOT MORE AND BETTER
Because reloads save money, you’ll probably feel better about practicing more often. That’ll make you a better shot. What a deal.
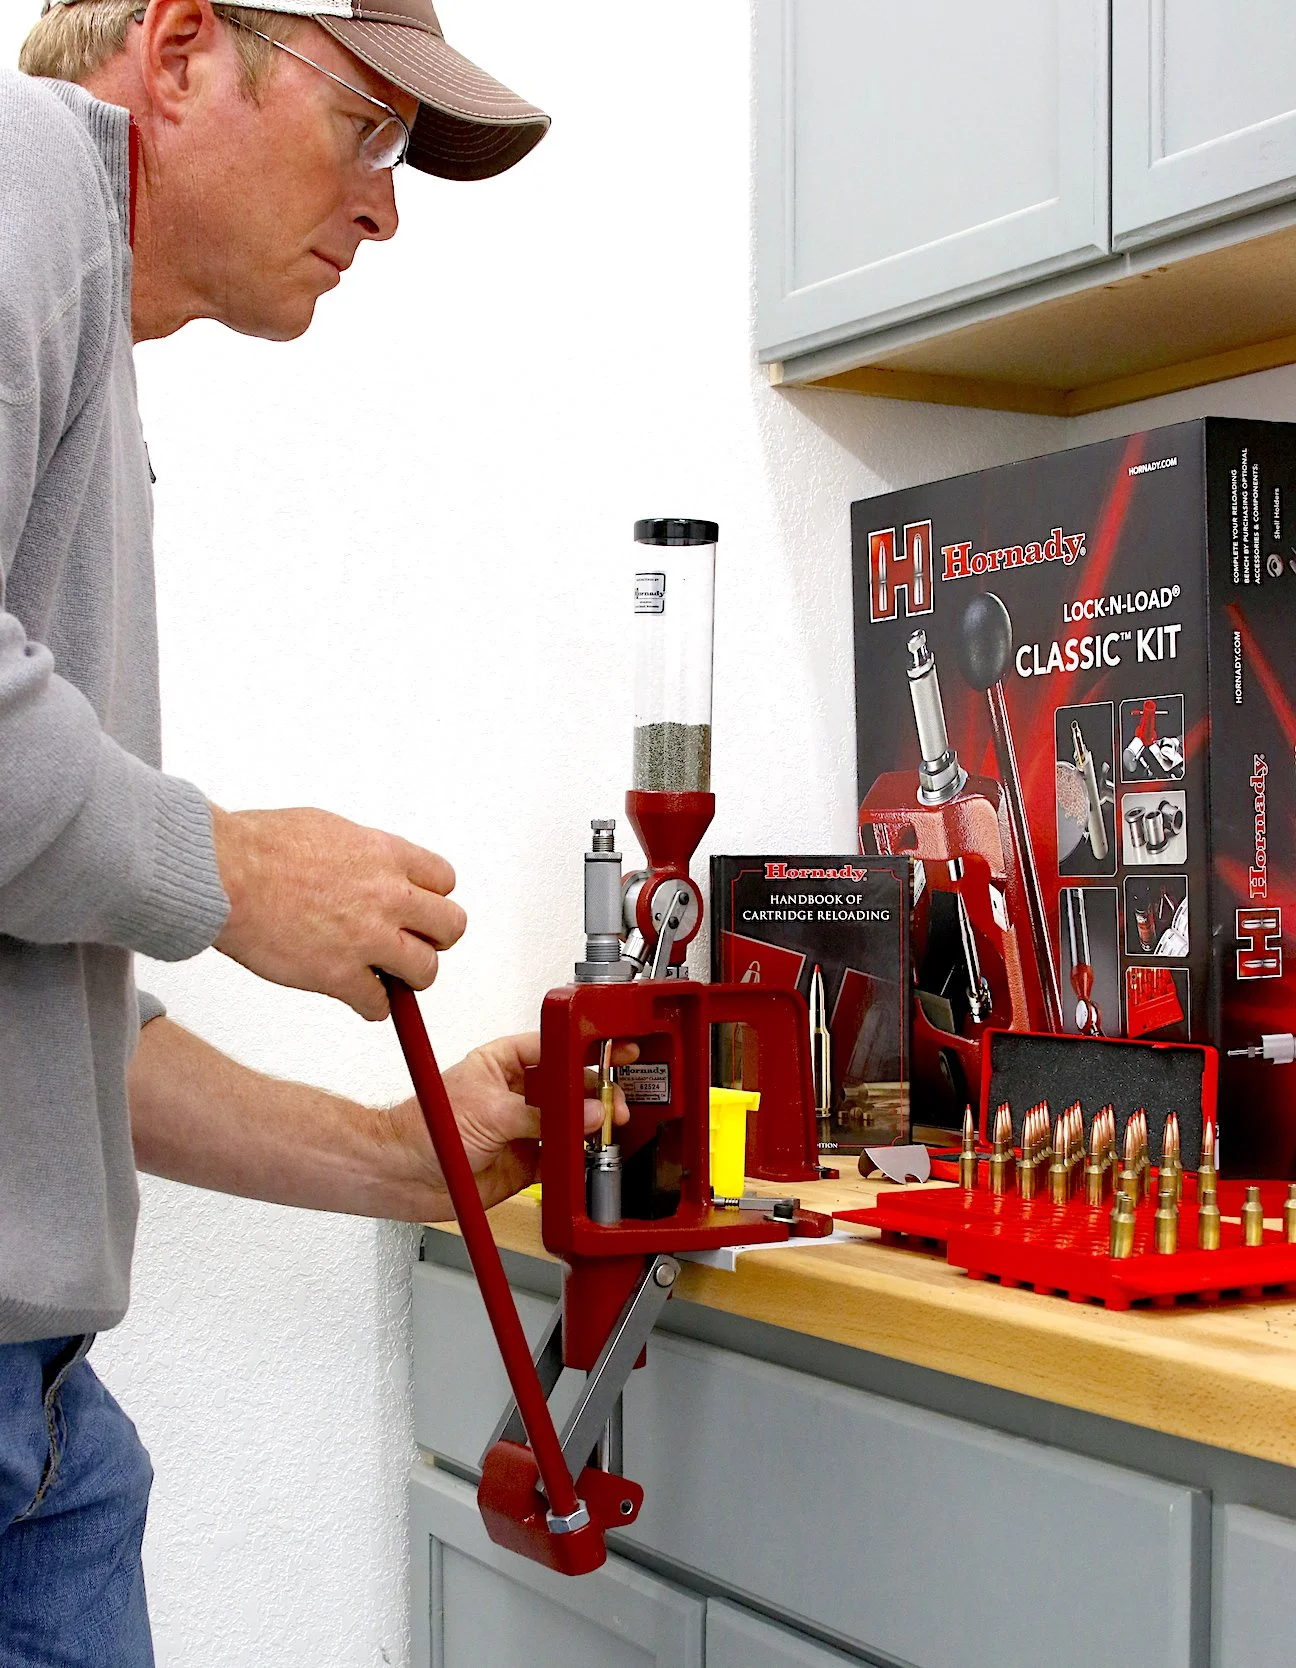
WHAT YOU NEED
So how do you begin and how tough is it? Start by buying a reloading manual, a recipe book that includes all the information you’ll need. And it’s easy. My brother and I taught ourselves with a couple reloading manuals when we were in high school, starting with shotshells and progressing to the slightly more complicated centerfire rifle cartridges. Rimfire cases can’t be reloaded. You can also research how-to information on the internet. Handloader magazine is another great resource.
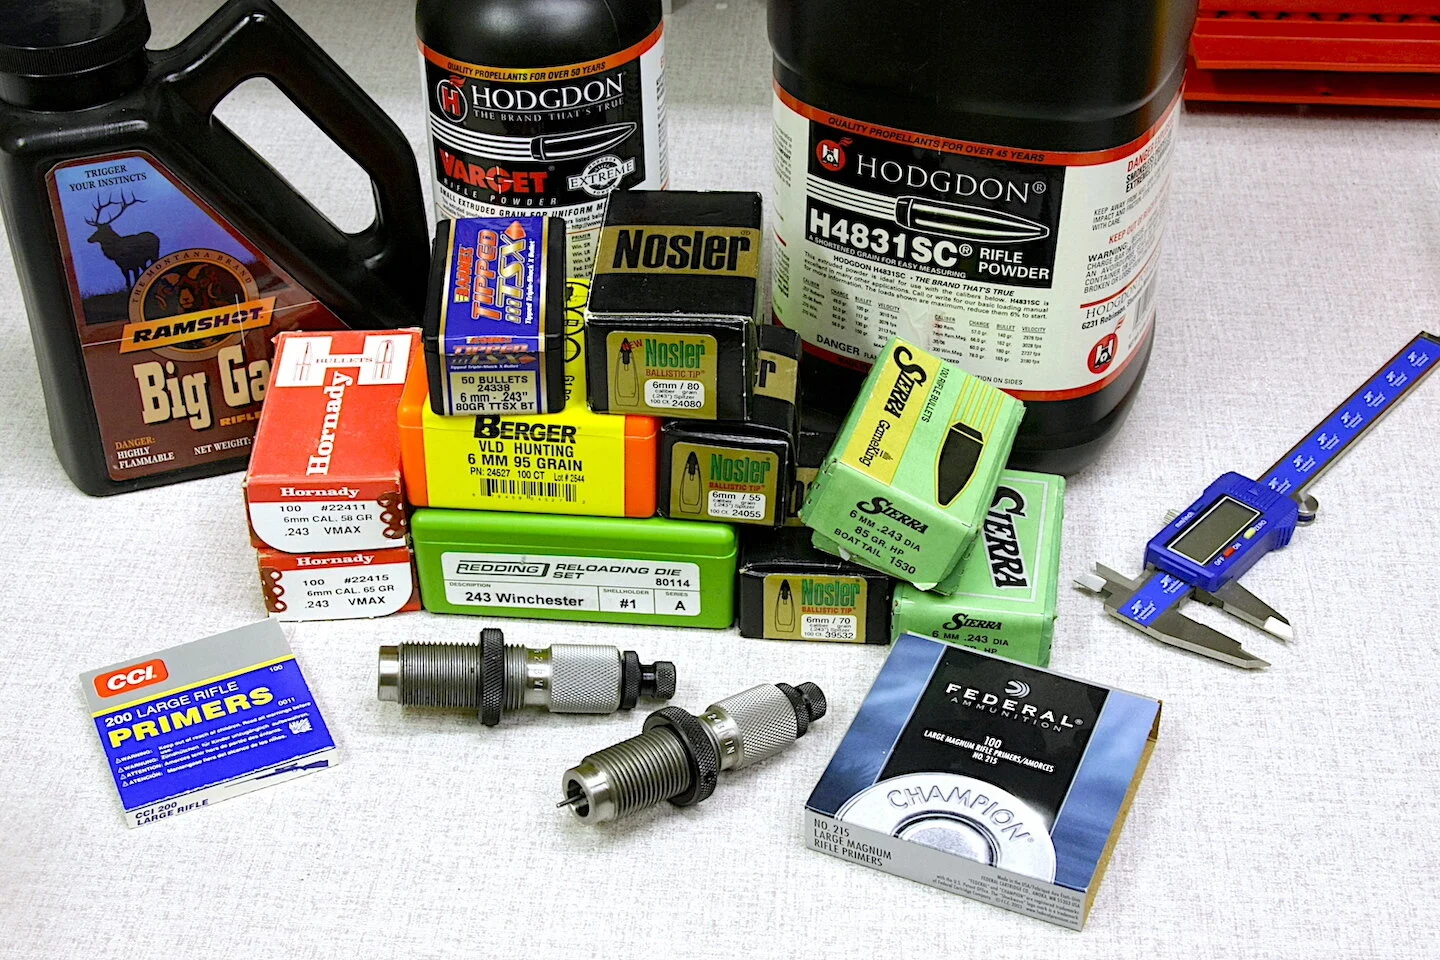
You can spend a small fortune on specialized equipment, but a basic starter kit for rifle / handgun loading should set you back only $85 to $300 dollars, depending on brand and quality. Here are the basic tools you’ll need:
BUY NOW

Press. This is the tool that pushes and pulls cases through the loading steps.
Dies. These are the metal chambers into which the expanded, fired case is pushed to squeeze it to original size. You can buy dies for loading any cartridge.
Scale. For weighing powder charges.
Shell holder. A platform that grips the shell rim and holds it in the press. One size fits many cartridges.
Lube. This oil or wax is applied to brass to prevent it from sticking in the die.
Chamfer/deburring tool. Bevels case rims so bullets start easily.
Case trimmer. Cuts case necks to original size after they stretch too long from repeated reloadings.
Funnel. This fits over the case mouth so you can more easily pour the powder in.
Calipers. Measures case length, bullet seating length and other important dimensions.
Priming tool. Seats the new primer in the case. Most presses include a priming arm, but some people prefer a separate, hand-held unit.
With those tools on hand, all you need are empty brass, fresh primers, powder and bullets. Some combination (from the recipes in the reloading manuals) should have your rifle shooting like the proverbial house a’fire, and then you can practice inexpensively until you really are a crack shot.
Basic Steps
With your handloading manuals and tools in hand, you are ready to build your first reloads. Let’s walk through the basic steps to clarify and boost your confidence:
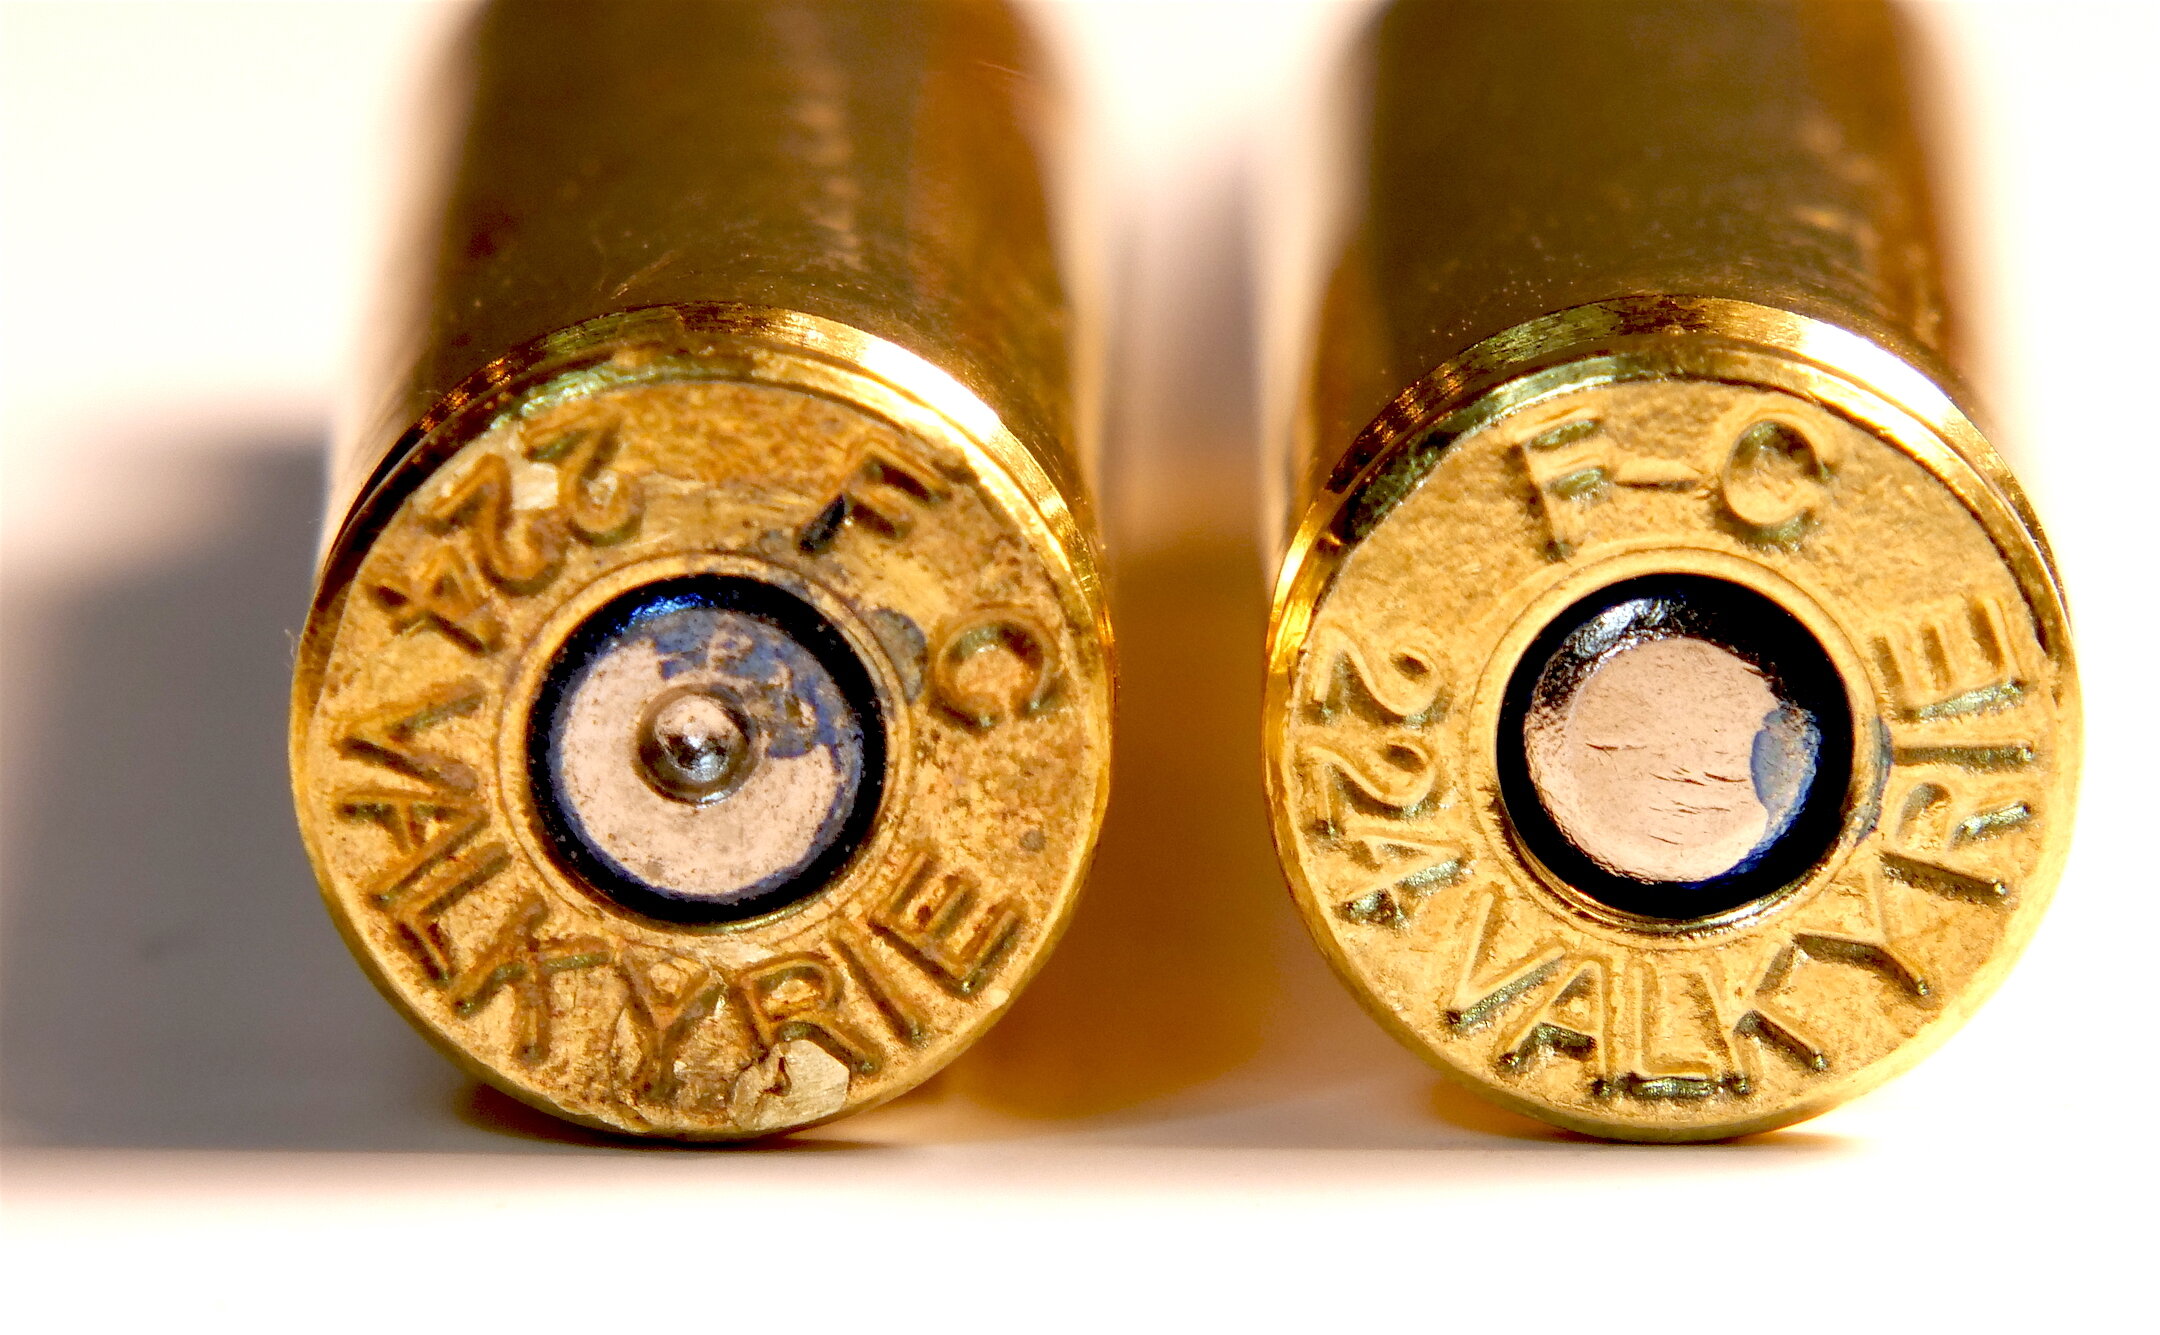
Collect your brass and sort by brand. The headstamp on the bottom of each case should designate it as Rem, Fed, Win, Norma, etc. That is the brand. The headstamp should also indicate the chambering, i.e. 270 Win., 300 Wby. Mag., 223 Rem., etc. The case itself might be brass or brass coated with nickle (shiny silver.) Both are loadable. Steel and aluminum cases can be reloaded, but this is not recommended. Steel isn’t as ductile as brass and is more “sticky” in chambers when fired. Aluminum is too easily eroded and liable to split. I recommend you stay away from steel and aluminum cases.
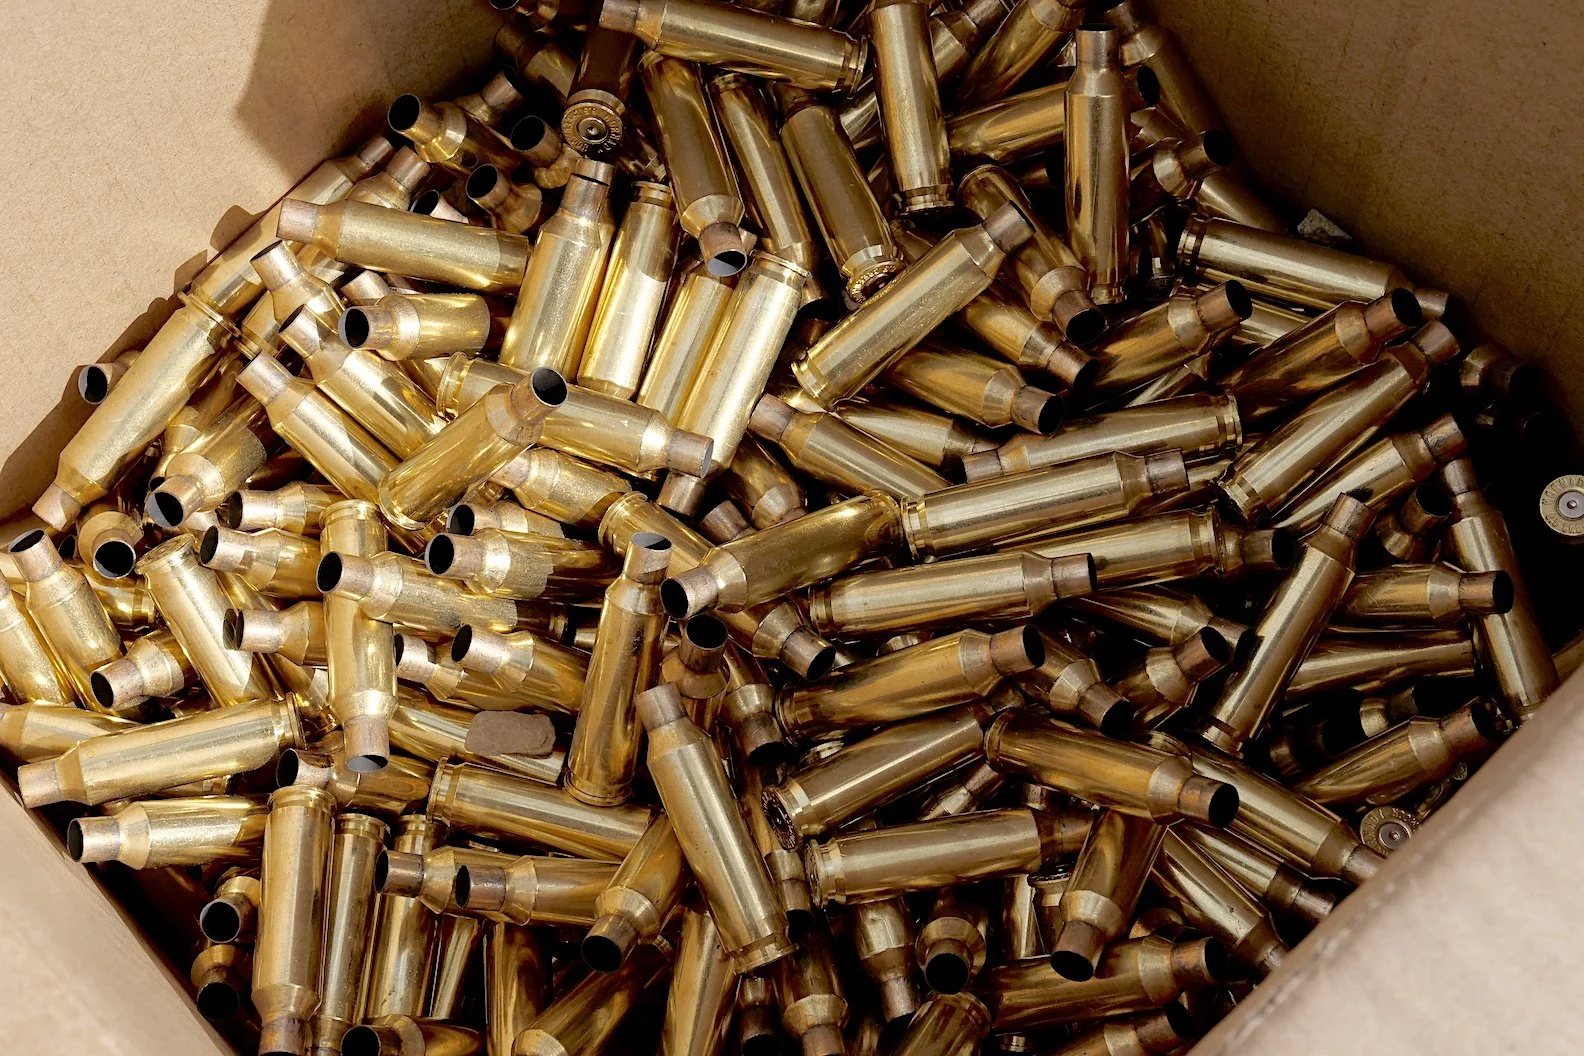
Once fired brass is a good source for building handloads. But it must be carefully sorted, inspected and cleaned.
The reason to sort by brand involves internal dimensions. Some brands use thicker walls or webbing in the head. This alters internal volume. Even same brand cases will vary in volume to a degree. Experienced handloaders interested in precision often weight each case and segregate by 0.1 grain. That’s not necessary for good hunting handloads, but might be fore precision target loads.
Your next step is to examine each case carefully for cracks or splits. These are usually at the mouth and neck, but sometimes around the body just ahead of the internal base. If a rifle chamber has excessive headspace, the body brass can stretch and thin at this junction. This usually happens after one or more reloads, rarely an initial loading. Discard all defective cases. Dents in the mouth/neck and even shoulder are not a big concern. Most will be ironed out during resizing.
Clean Brass. Dirty brass wears itself and your dies. Run a case neck brush down each neck internally. Wipe cases clean before lubricating. If brass is particularly stained, oxidized or dirty, you can tumble it in corn cob or walnut hull granules inside an electric rock tumbler/vibrator.
Lubricate Brass. A variety of lubricants can be used. They insure the brass does not stick in the resizing die. I find the new spray on lubricants like Hornady One-Shot are less messy than the old oil versions. They are also safe to use to lubricate necks inside and out. Follow directions on the can.
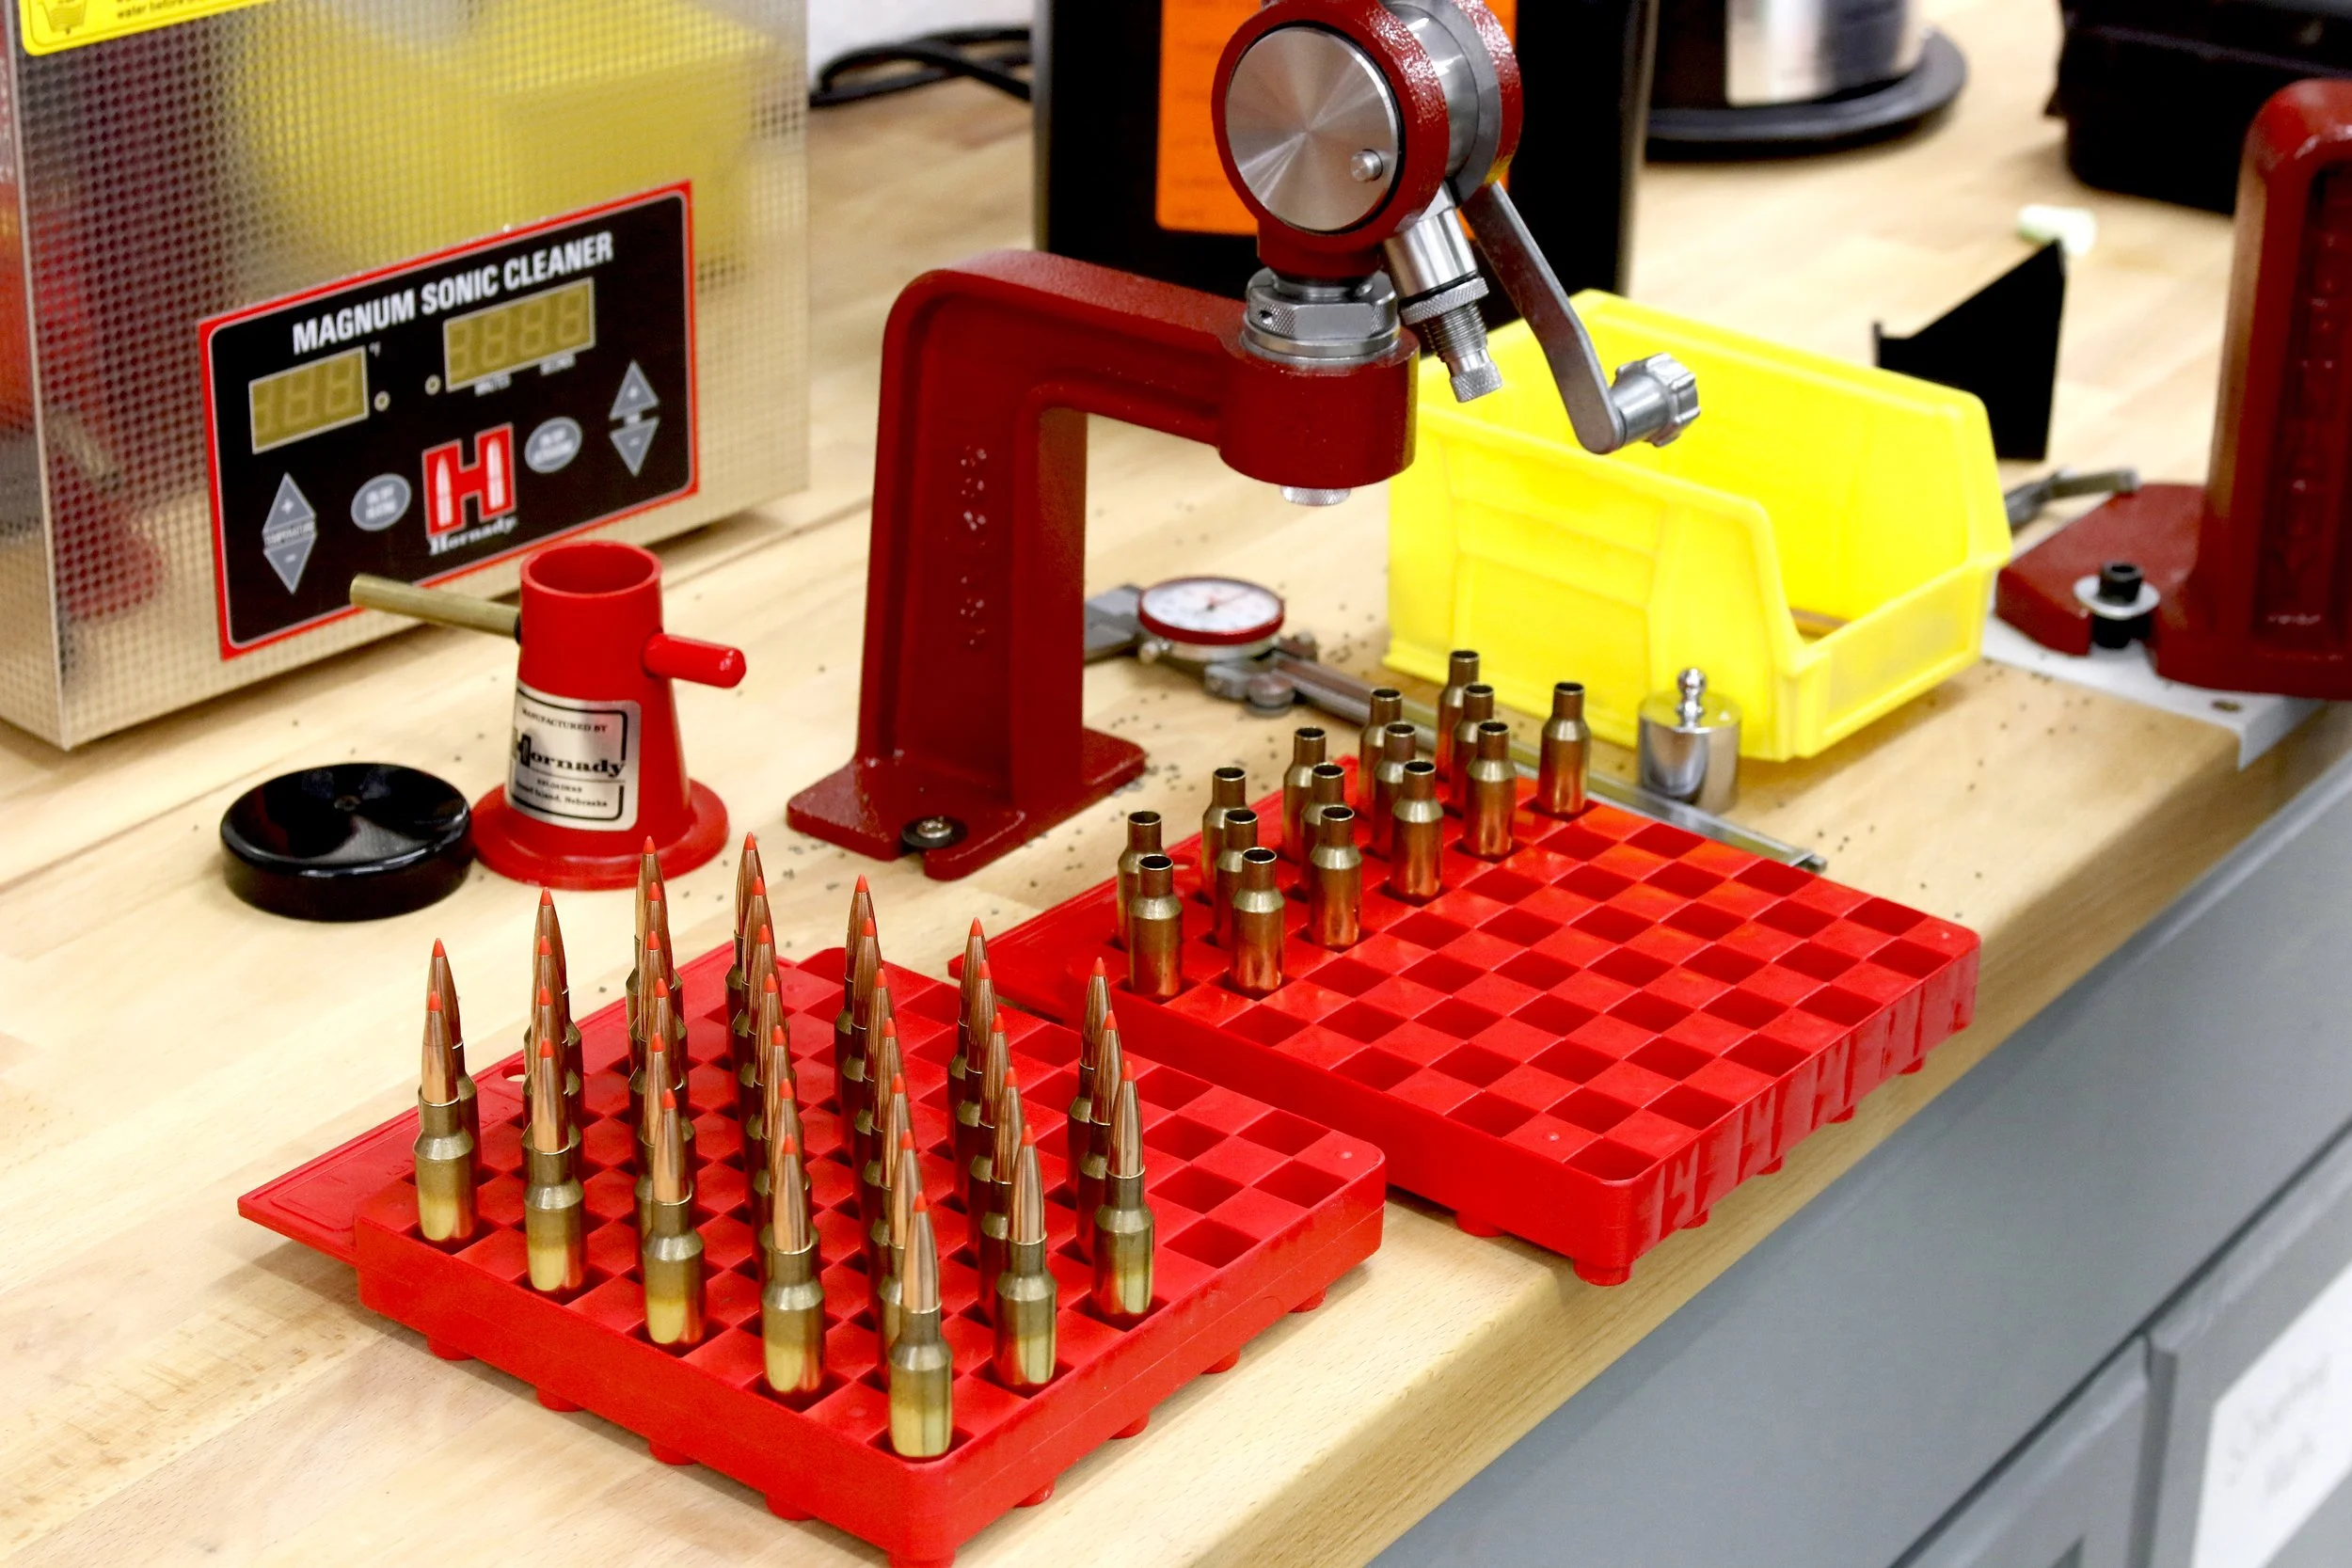
Loading blocks hold cases in various stages of the loading cycle. Ideal for organization.
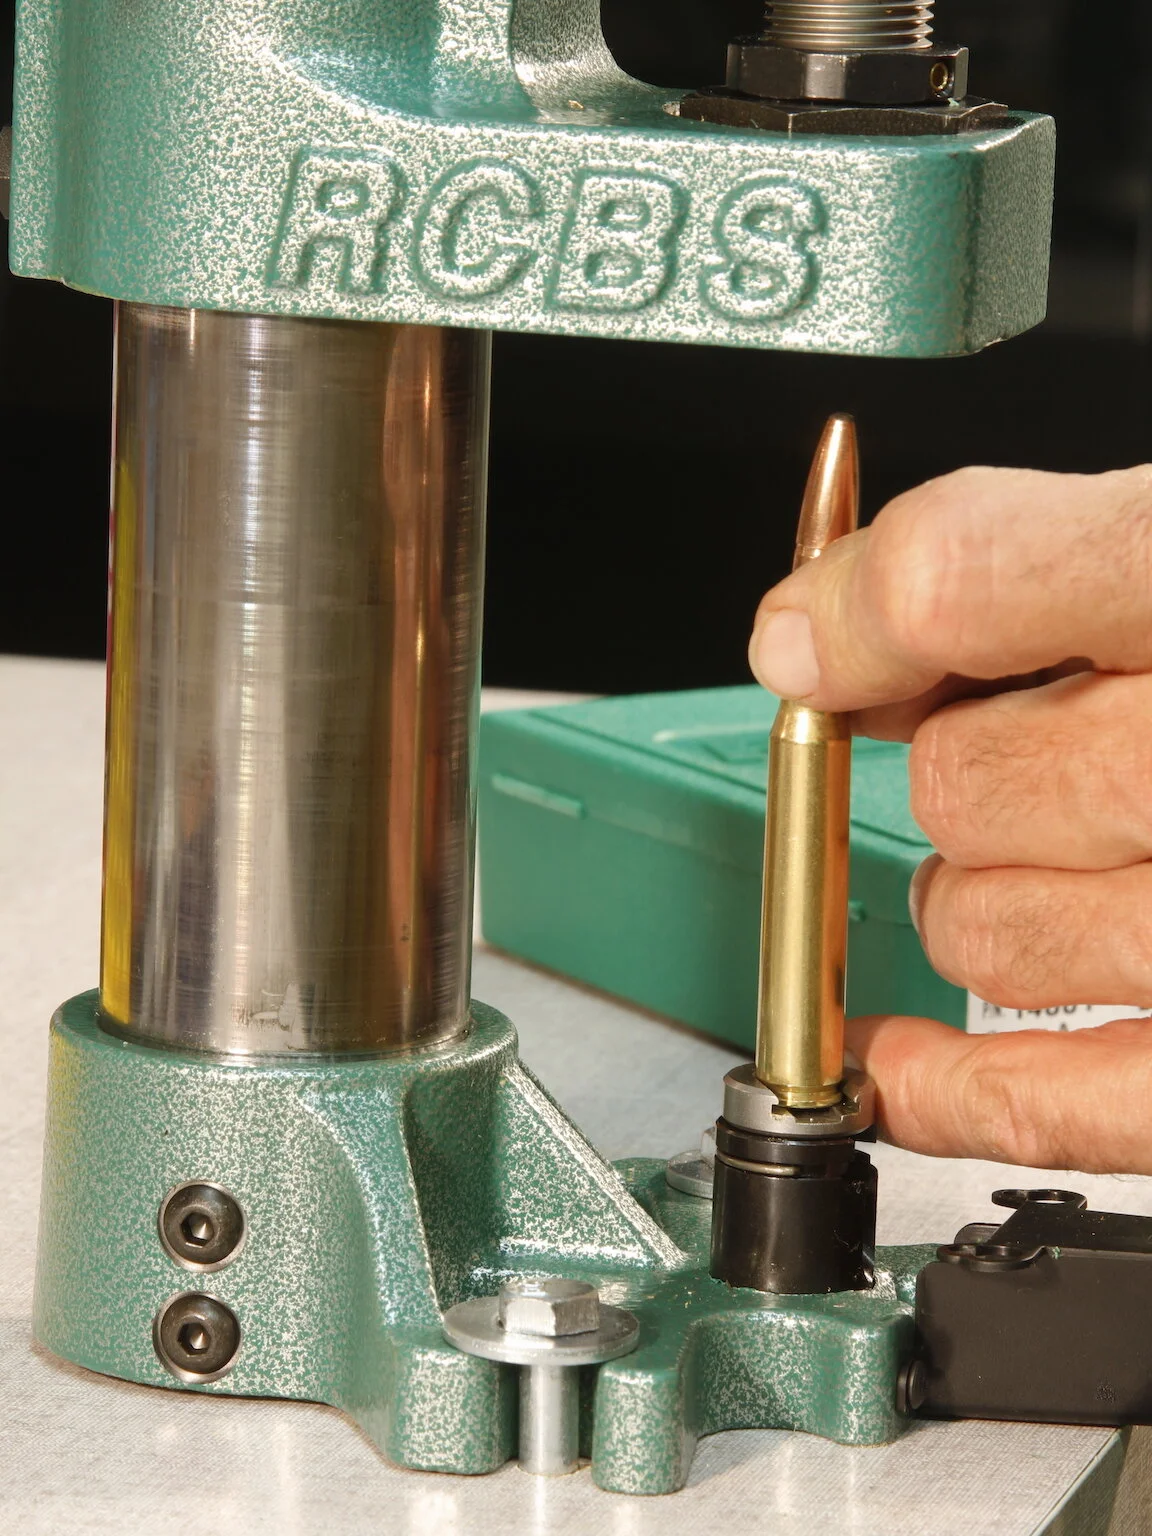
Resize Each Case. Now we’re getting to the heavy lifting, or pressing. You slide the case head into the shell holder atop the press ram, then push the press handle to slide the case up and into the sizing die. It’s a tight but smooth fit. A depriming pin in the die will push out the old primer. Lift the handle to pull the sized case out. Set it aside in a resized case loading block and size the rest of the cases. (Most shooters size in lots of 20, 40, 50 or some set number.)
Clean Off Lube and Scour Primer Pockets. Use cloth or paper towel to wipe clean each case, then a primer pocket cleaning tool to scrape out the old (black) carbon. For more detailed case prep you can “uniform” each pocket with a tool, but that’s for more advanced work. Another advanced step is to debur the flash hole inside and out with a special little tool.
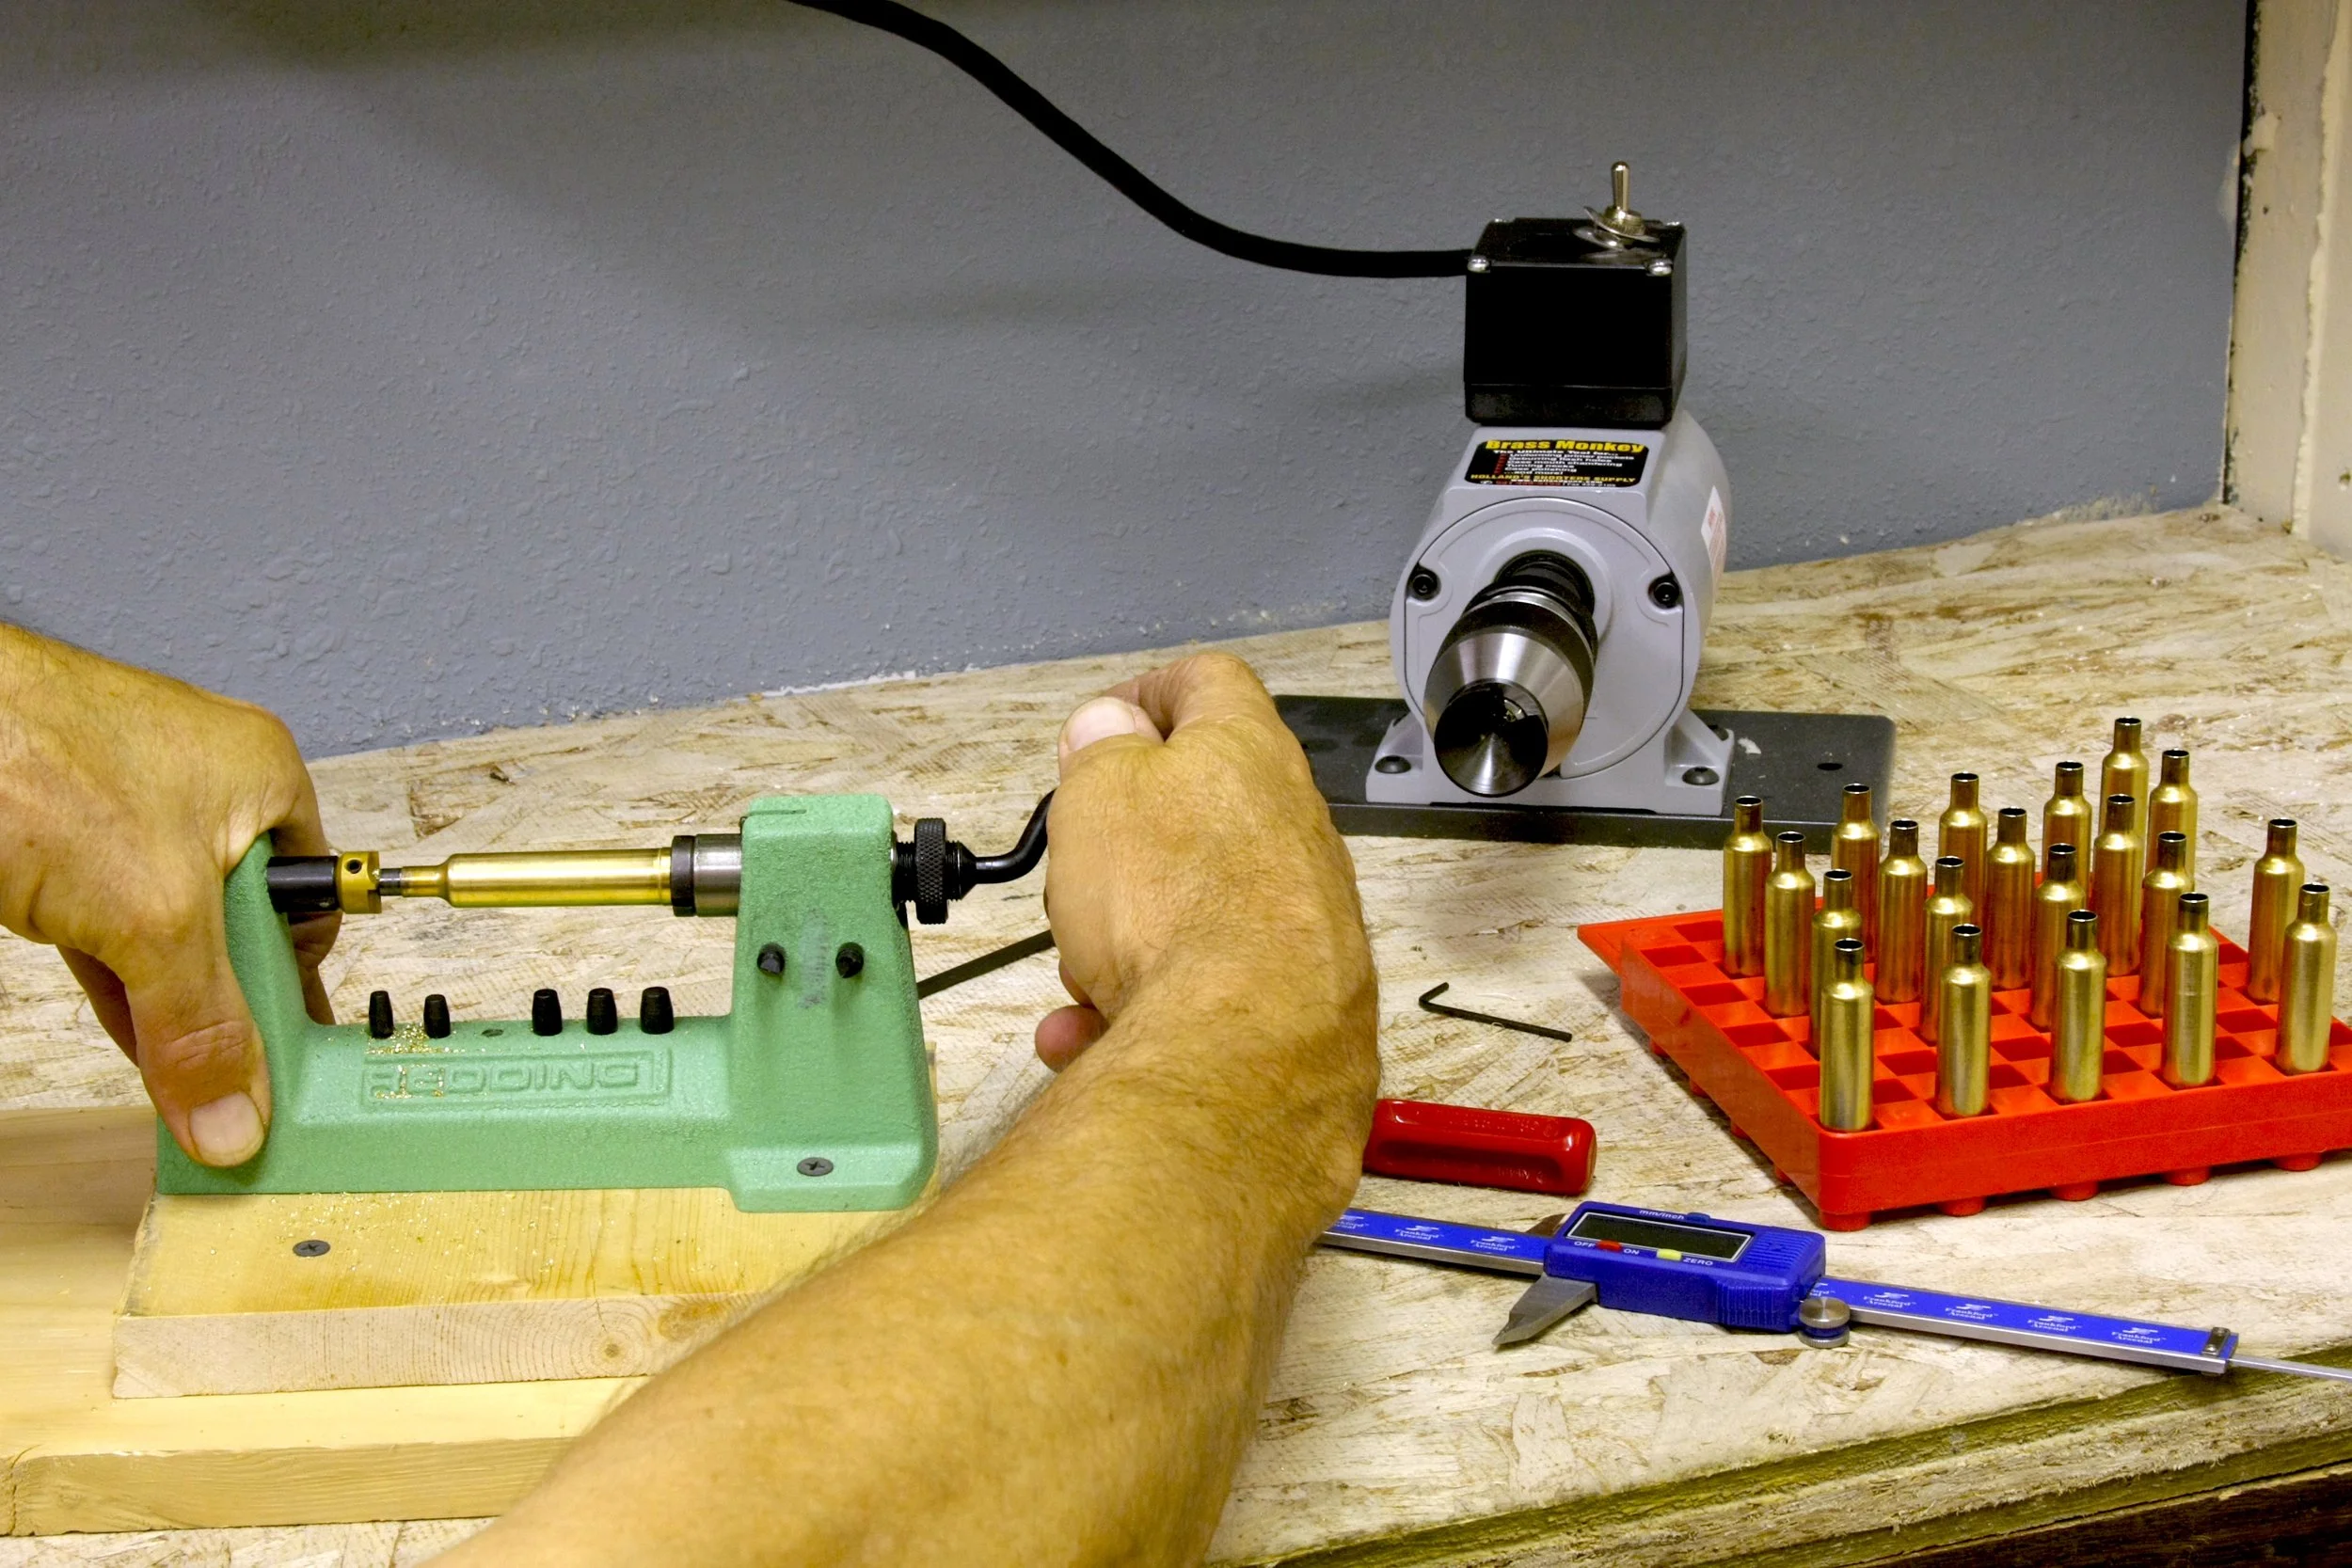
Necks that stretch too long must be trimmed, then the edges chamfered smooth.
Measure and Trim Case Necks for Length. Your handloading manuals will specify maximum case length. Use a caliper to measure this. If max length is exceeded, you’ll need to trim the necks with your case trimmer lathe or a file. A lathe is easier. Chuck up each case and spin down that excess neck. Then chamfer the mouth inside and out.
Re-prime Cases. Here’s where you start feeling as if you’re making headway. Press a fresh primer into the pocket of each case. Handtools or the priming arm on your die can be used. Strive for a consistent press fit. If primers are not seated deep enough, the case will wobble atop them and may not allow some actions to close over the cartridge. If too deep, the primer anvil may be crushed enough to alter ignition. In decades of priming with various tools I’ve never crushed a primer too much.

Hand primers give a good “feel” for proper seating depth.
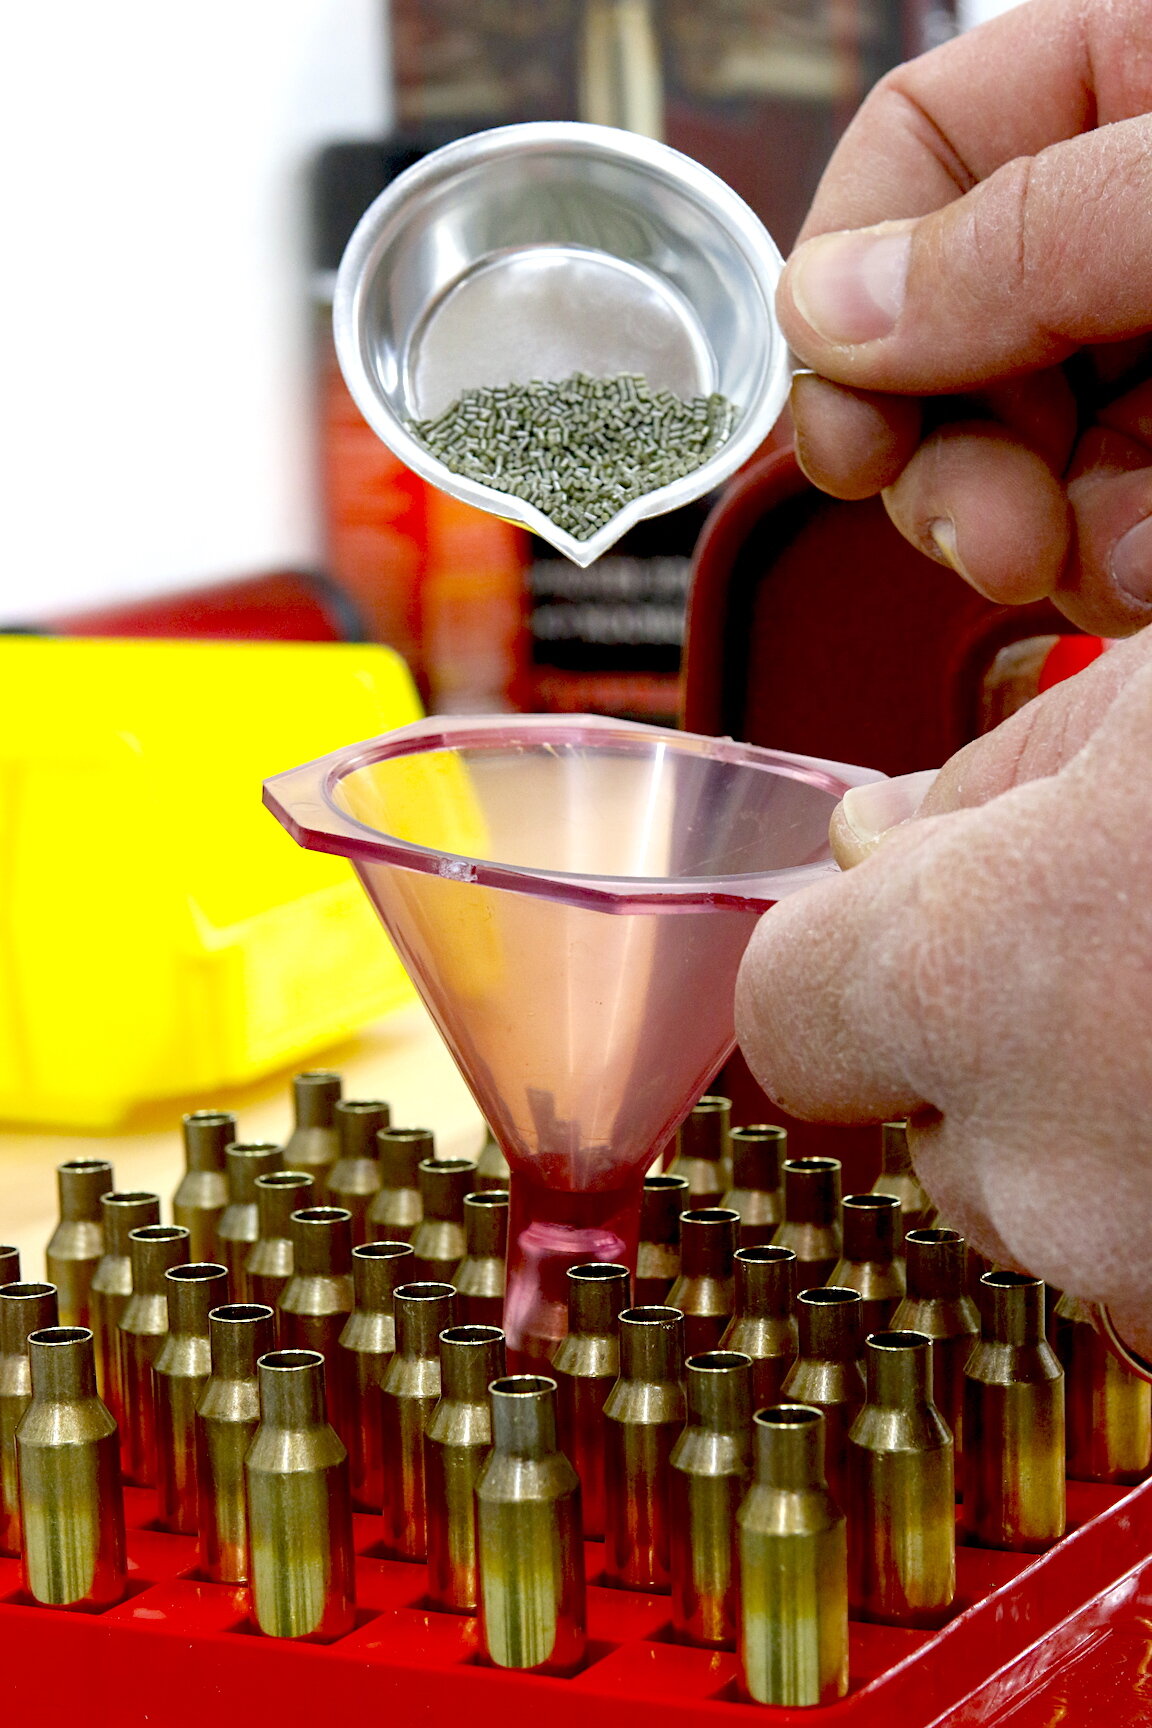
Fill Cases With Powder. This is simple, basic step of pouring smokeless powder into the mouth of the case as it sits in your loading block. You’ll use a funnel to ease it in, a scale to weight the proper dose. The complicated part here is choosing the proper powder and dose. Your recipe manual will specify this. Many powders can be used, but don’t exceed doses. Always start with low doses and work your way up while watching for pressure signs and muzzle velocity. Every rifle shoots the same load a bit differently, so don’t expect book recipes to perfectly match your results. Muzzle velocity is the best indicator of safe pressures. You can watch for sticky bolt lifts, shiny ejector marks on case bases, etc., but those aren’t ideal for measuring pressure. It’s safest to not exceed book recipes.
You can scoop powder into the scale pan with a spoon, but I recommend dumping with a hopper powder measure. Set it about a grain lighter than your final load and trickle the final grain in.
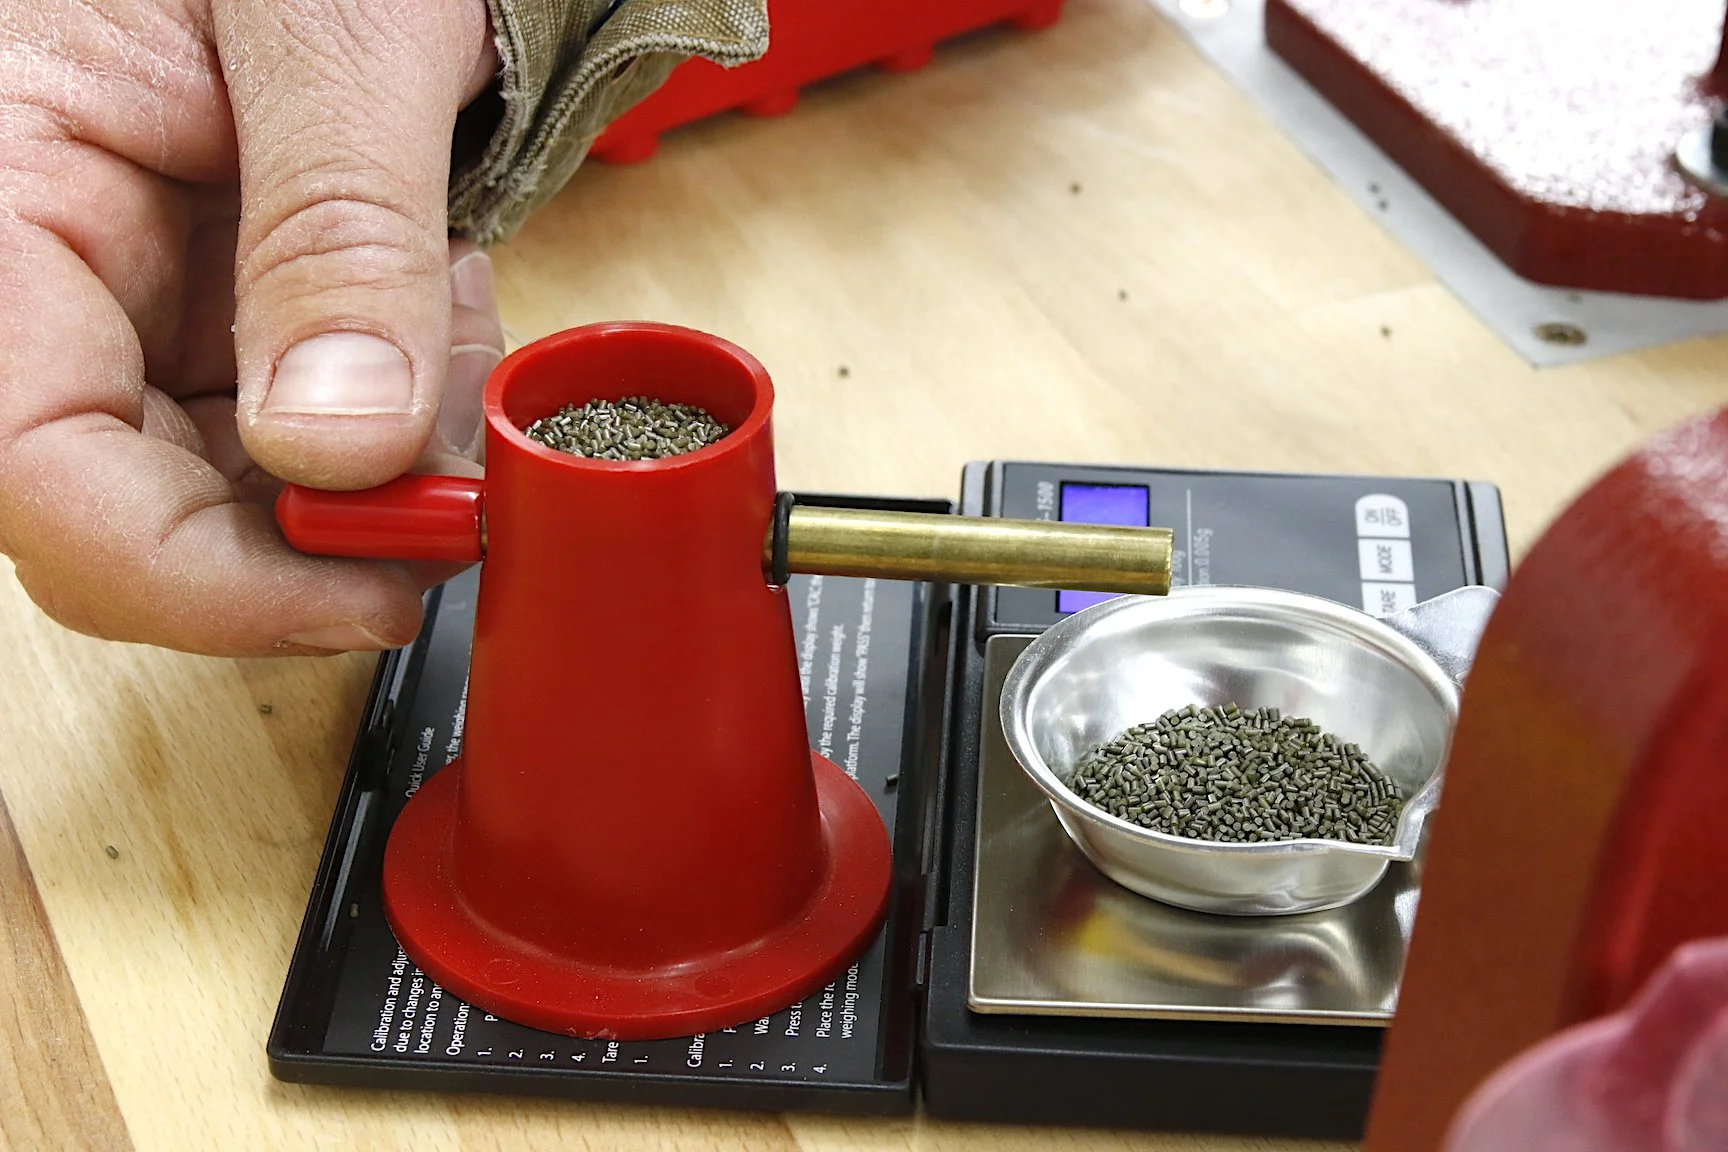
A powder trickler helps drop the last tenth of a grain into each load.
Visually Check Powder Levels. Before seating bullets, shine a flashlight and look into each case to assure the powder is there and roughly to the same level as the others. Sometimes powder sticks in powder measures and you get a few grains less in one load, more in the next. This is why I recommend weighing each.
Seat Bullets. This is the most satisfying step! You again slide each case into the shell holder on the press, but now you’ve removed the sizing die and inserted the bullet seating die. Follow directions to adjust it for proper seating depth. Hold each bullet on the mouth of each case and guide it into the die while pushing down the press handle. Don’t pinch fingers. Varying seating depth can dramatically alter rifle accuracy. We’ll address that in a future blog.
Seating bullets is a satisfying step in the process. Almost done!
Test. Load testing on the range consists of chambering each cartridge to see if it fits, then firing over a chronograph to check speeds. Sometimes you discover you’re getting 100, even 200 fps more or less velocity than the recipe book indicated. Such is the nature of the beast. Because of this initial discovery, you should build but one to three loads at a given powder dose. I often start low and load up one grain at a time until one or two grains under the book maximum. Then I shoot from low to high, watching speeds and pressure signs for safety. Usually I’ll end up going out again with two or three cartridges at or near max before discovering magic. Mainly, though, you want to find a load below or at maximum average pressure with MV close to predicted or what you’d like. Often slighly slower loads shoot more accurately than the fastest. Lighter loads also use less powder and contribute to longer case life. Cases loaded light can ofter be used 5 to 10 times. Cases at high pressures might “burn out” in as few as three reloads.
Those are the basic steps. One you’ve done them a few times you’ll grow confident and load rather quickly, but always keep your head in the game, screwed on straight, and following all protocols. This is not the time to listen to podcasts or daydream about anything. You will be doing serious work that could spell the difference between trophy buck and “better luck next year.”
Before closing, I urge you to stock up when you can. Handloading can save the day when factory ammo is hard to find, but just as factory ammo becomes scarce, so do bullets, primers, and powder. I hate to encourage hoarding, but it seems to have become almost necessary in today’s world of delays, work stoppage, and shortages. One just can’t trust the supply chain. Primers are versatile and needed for all cartridges. They don’t go bad in a lifetime if stored properly. Ditto powder. Determine which powders you need and sock in a good supply. Bullets are a bit more cartridge specific, but one caliber can supply multiple cartridges of that caliber. My stash of .224s work for my 223, 22-250, etc. My .284s fit all my 7mm cartridges, etc. Look into bullet casting for lower velocity cartridges and reduced loads. Be prepared!
The author has been handloading since the late 1960s and still has all his limbs.